
Thank you all, loyal blog readers for your support over the past couple of years. Every time a new follower signs up, or I get a comment or a ‘like’ I know that writing this is worthwhile! Looking ahead, I have decided to start to grow The One-Handed Cook into a website and my blog will form part of the new site. You can read it here: www.theonehandedcook.com
You will find lots of recipes, gadgets and advice for busy people juggling babies, work, family and life – as well as some new strands and, of course, this blog!
Please do check it out and spread the love for my fledgling brand.
You can also find me on Twitter @onehandedcook and Pinterest
Come and follow me anew on the website!
TOHC x
Every now and then I come across a kitchen gadget that I just LOVE. It’s not often I stumble upon three. Three gadgets that this busy mama loves – and why? Because they Make Life Easier. Which we like. I recommend you get your hands on these, and quick.

Toast tongs: get some
Wooden toast tongs
Utter genius for anyone who likes toasting awkwardly shaped bread-related items with a tendency to get stuck in the toaster, or else be finger-searingly hot once they’re done: think hot cross buns, bagels, waffles, odd crusts and so on. So how do you get them out? You need slim, bamboo tongs with a cunning magnet on the side TO STICK THEM TO THE TOASTER SO YOU DON’T LOSE THEM (yet more genius) – and enable you to make toast one-handed – of course. Get through breakfast with panache. Buy them Lakeland for just £1.99.

Nice for spice
Spice jar measuring spoons
Frankly, I can’t believe I’ve lasted 39 years without a set of these. Slimline measuring spoons that fit into narrow spice jars. They will actually help make cooking quicker, easier and less messy, I promise. There’s not much more to say really, other than these are completely brilliant and I consider them essential! Available from Amazon, John Lewis and Lakeland and made by the brilliant guys at Oxo Good Grips.

So useful!
Sparkling wine opener
I’ve never been a fan of opening prosecco or champagne bottles – I have an innate fear of the cork literally exploding out of the bottle and causing a major incident. So I tended to always get a friend to do it. No longer with this little gadget, the Sparkling Wine Star, brought to you by Le Creuset (www.lecreuset.co.uk) – simply remove the foil, attach star to cork and twist. Pour and relax. An absolute must for every knackered parent out there.

Time for some bubbles

Get ready to fall off the sugar-free wagon…
Happy New Year, peeps! I hope you all had a lovely Christmas break and have come back refreshed. I have to say, I was quite delighted to get back to the routine… and then I got back to the routine and decided it wasn’t that great after all. Hey ho.
So what does 2015 have in store? Most excitingly a trip to New Zealand is in the pipeline this December. Yup, Christmas 2015 will be spent on the South Island with Husband’s brother and his family, which is something to look forward to, and a motivating factor in my quest to get fit and healthy.
So, time permitting, I am getting back into running and have already been several times during the last couple of weeks. Of course, it’s fitting it in around the family and work that’s the issue, especially given that it’s dark in the morning and the evening, which I don’t find very motivating. But I have also built more walking into my daily commute, which is good for my health, and has the added benefit of being cheaper, too. I have been listening to the (very gripping) Serial podcast as I walk, which helps pass the time.
We’ve been making lots of delicious smoothies and healthy breakfasts, including overnight oats, here at OH HQ, too (more to come on this soon!), and both Husband and I have been doing loads of cooking from various cookbooks – new and old, which has been lovely.
I am LOVING our new KitchenAid, and so Littlest and I spent the afternoon making a chocolate cake because, well, just because really! She loved cracking the eggs, sifting the flour (although she did get bored half way through) and stirring and mixing. A great way to pass a winter’s afternoon with a little one.
Come on, it’s time to fall off that sugar-free wagon in style. Just a small slice…
Enjoy!
TOHCxx
Moist Rich Chocolate Cake
This recipe is slightly adapted from The Guardian’s ‘Guide to Baking’, which was given away with the newspaper way back in 2007 and this chocolate cake is simply incredible. The icing is from Nigella’s Feast, and is the icing she uses on her Chocolate Guinness Cake. Nothing healthy here, I’m afraid, it’s pure indulgence!
You will need:
375ml boiling milk
100g dark chocolate, chopped (I just broke into chunks tbh)
275g caster sugar
225g plain flour
75g cocoa powder
1½ tsp baking powder
¾tsp bicarbonate of soda
1 large free-range egg, plus one yolk
75ml sunflower oil
25g golden syrup
2tsp vanilla extract
What to do:
- Heat the oven to 180C (160C Fan) and line the base of a 20cm diameter, 9cm deep round cake tin (or the closest you have to this) with baking parchment.
- Melt the chocolate into the boiling milk and allow to stand and cool for 15 minutes or so.
- Meanwhile, weigh and sift all of the dry ingredients into a large mixing bowl (I used the KitchenAid bowl).
- Whisk together the eggs, oil, golden syrup and vanilla and then beat into your milky-chocolate mix from step 2.
- Whisk this liquid into your dry ingredients for 30 seconds (this is where I used the KitchenAid) until smooth, and pour the batter into the tin.
- Bake for approx. 50 minutes, or until a skewer inserted comes out clean.
- Allow to cool before topping with the below.
For the topping you will need:
150g Philadelphia cream cheese
75g icing sugar
60ml double cream
Cocoa powder for dusting
What to do:
- Lightly whip the cream cheese until smooth – I used the KitchenAid to do this (because I love it).
- Sieve over the icing sugar, and then beat both together.
- Add the cream and beat again until it makes a spreadable consistency. Spread over the top of your cake and sprinkle with cocoa powder from a fine-mesh sieve.

Ho ho ho!
It’s that time of the year again – when I wish I’d started Christmas prep in September… But hey ho, I’m just not that organised. If you are feeling the strain slightly, here are my Top Five Tips for a Great Christmas Day for busy mums, dads, grannies, grandpas – and everyone else.
- Do not panic. Get organised by thinking through the entire menu in advance and the various pots, pans and other dishes you will need on Christmas Day – check you know where they are, they are clean and they are ready to go.
- Delegate. If your child is old enough to carry cutlery without falling over and accidentally stabbing themselves then they can help set the table. Get your dad to serve the drinks. Uncle Geoff can wash up. Small children like tasks too – you need everyone on board here. Your new mantra is, ‘Remember, there’s no ‘i’ in team, folks!’
- Preparation. Check now you have the following essentials at home: batteries, coffee, black bin bags, number for local taxi firm, corkscrew that actually works, kitchen roll, loo roll, matches, copious amounts of sparkling wine 😉
- Get outside. It is very easy to get very hot, quite stressed and cooped up in the house on Christmas Day. Get outside for some fresh air – you and the children will appreciate it! Stretch your legs with a little walk – you will come back to the hectic household feeling refreshed (and maybe even ready for more cheese…).
- Music. Everyone likes a festive tune to help gee things along; line up a great Christmas playlist now (or better still, delegate this to husband/boyfriend/teenager– see point 2) – from carols to Bing Crosby, a good old family singalong as you dry up the dishes together can be one of those bonding moments you never forget!
Enjoy your Christmas Day!
It’s been an amazing year for me on lots of fronts, but of course, like any working mum of young children it’s had its stressful moments too, so I am really looking forward to a break from the routine. We are spending Christmas day with my lovely mum and dad, which we are all looking forward to. (Mum – make sure you read my handy tips!)
Thank you everyone for reading my blog, for sharing your stories and for supporting The One-Handed Cook in 2014. Thank you to the brands I’ve worked with for your support, too. Here’s to more in 2015.
Have a lovely Christmas everyone!
TOHC xoxo

From this….

….to this!
Regular readers will know I am a *little bit* obsessed with storage containers. I know, sad but true. But they’re just so practical. And varied in shape. And with interesting little sections and snap-on lids. Who needs the Tiffany diamond department when you’ve got Robert Dyas’ plasticware section??
Recently the lovely folks at Joseph Joseph caught wind of my love of storage containers and sent me this beautiful nest of coloured containers to test. Well, obviously I love them. They don’t only look stylish, they work really well. The lids are colour coordinated with the container part via a little coloured dot so there’s no risk of mixing them up, and for those who are tight on space, the lids snap together for almost-flat storage, and the containers stack inside each other, making for a neat and tidy cupboard.
The containers are air-tight with silicone seals, see-through (handy) and über stylish. Look!

So it’s bye-bye to the sad old Tupperwares inherited from my mother, and the shambolic cupboard full of plastic boxes with missing lids (or never the right lid…), and hello storage heaven… The corner cupboard in my kitchen has never looked so smart. At £40, it’s the perfect Christmas gift for any stylish foodie!
TOHC x
Disclaimer: I was sent the Joseph Joseph Nest Storage 6-piece container set for free to try out.
Get ready to tuck in!
Exciting things are afoot on the blog; it is being redesigned *as we speak* which means that pretty soon I will be unveiling the new look for Spring/Summer 2015 on The One-Handed Cook website. Woo hoo.
In other news, Black Friday and Cyber Monday have been and gone, which means that Christmas is practically upon us. I’ve made a list, I’m checking it twice, and yes, I still need to buy about 800 presents. I have started an Excel spreadsheet to keep track of all the gifts, which feels a bit too organised, even for me.
What else is new? Well, my son is obsessed with Match Attax trading cards, my daughter with her Tiny Tears doll and my husband with his new KitchenAid, which he was given for his birthday. A beautiful red KitchenAid just for me him.
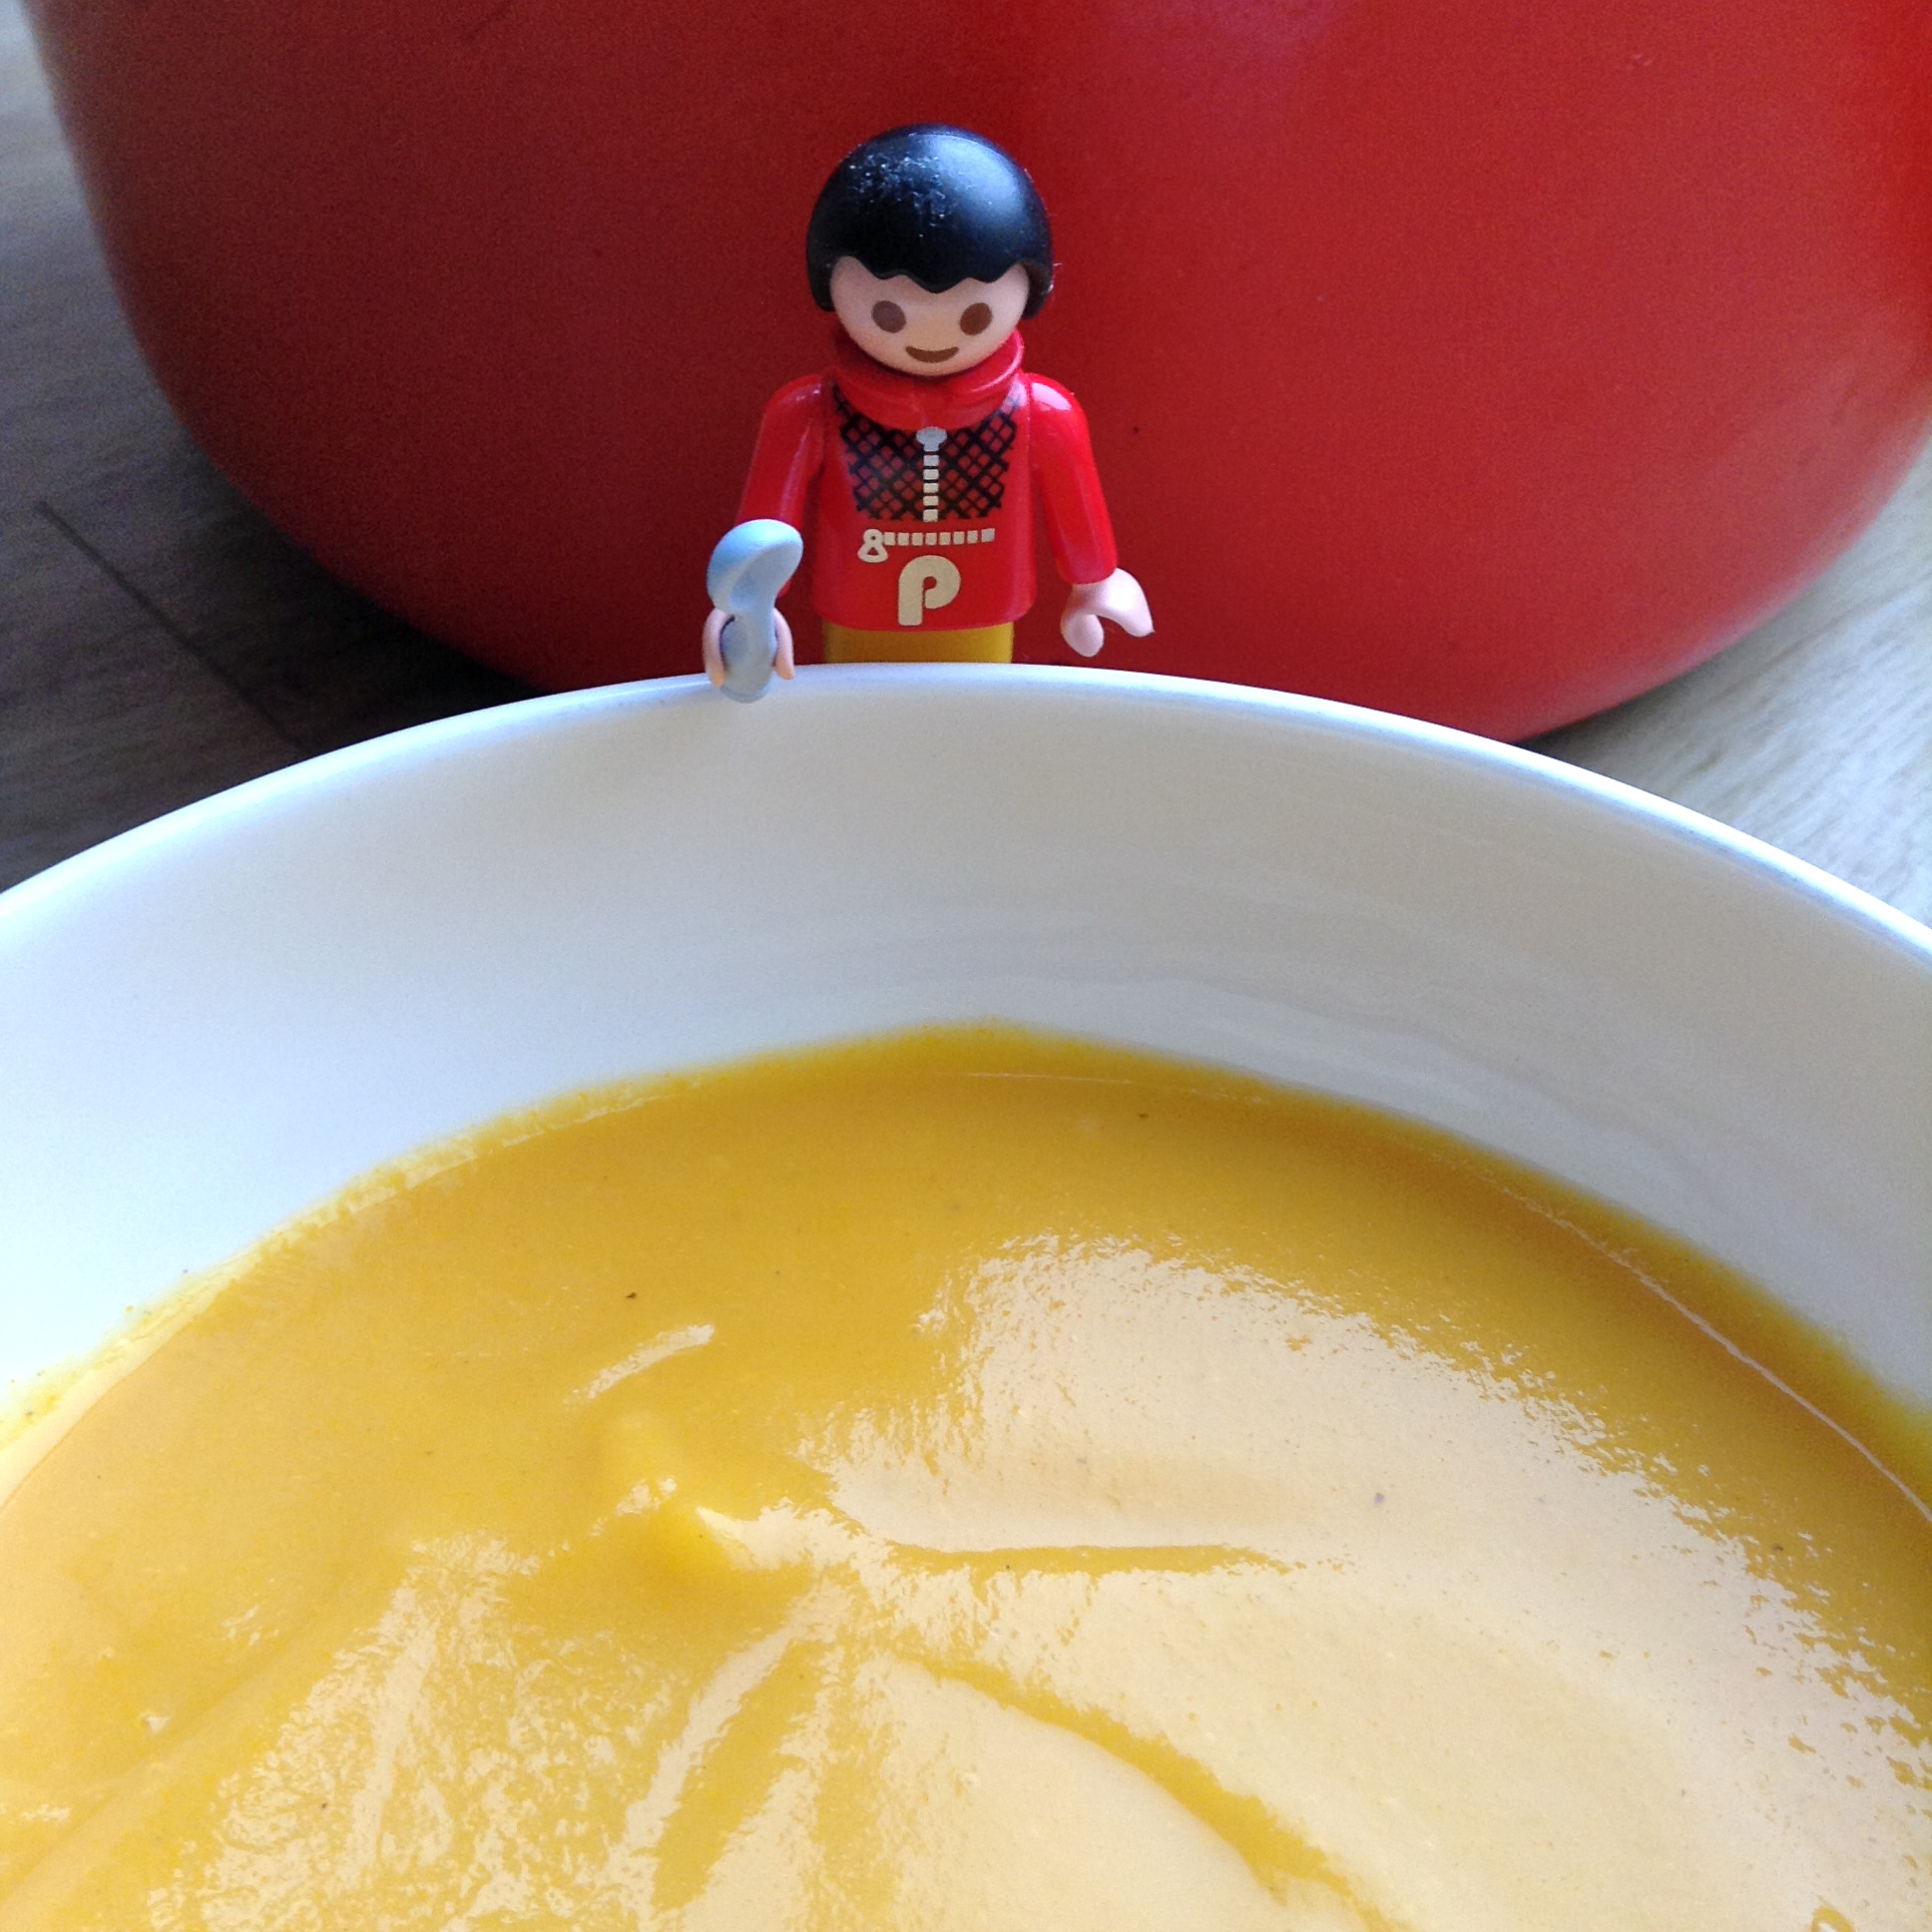
In the meantime, here’s something for you: a soup recipe to help chase away the November blues. It’s a recipe my grandma – a wonderful home cook – used to make, and my mum has passed it on to me. Like all my soup recipes, it’s dead easy to make, and completely delicious. You can make it in stages – make the soup and liquidise it later, if needs be. It also freezes really well, so make double if you have the energy – and freeze half for later. Steaming hot, silky smooth, deliciously fragrant Carrot and Tarragon Soup on a cold winter’s day; what could be nicer?
Stay warm,
TOHC xx
Carrot and Tarragon Soup
A delicious soup for the whole family. Omit the salt – and go easy on the pepper – if serving to babies and toddlers. If serving to grown-ups, the soup looks good served with a swirl of cream and a bit of chopped parsley on top. It will keep in the fridge for several days and freezes well in an air-tight container.
Makes 8–10 portions
You will need
2tbsp light olive oil
1kg carrots, chopped into chunks
1 large onion, chopped
2 largeish potatoes, peeled and cut into eight
1.5 litres (approx) vegetable stock (I use Marigold bouillon)
1tsp freeze-dried tarragon flakes, or 1tbsp fresh tarragon, washed and chopped
Sea salt and freshly ground black pepper, to taste
What to do
- Heat the oil in a large, heavy-bottomed saucepan (I use a Le Creuset), add the onions and cook gently for a few minutes.
- Add the carrots, stir well with the onions and continue cooking for a further 5 minutes or so.
- Add the stock, the potatoes and the tarragon. Bring to the boil and simmer gently for 20-30 mins. Check that the carrots are cooked.
- Remove from the heat and allow to cool slightly. Liquidise in a blender, keeping an eye on the thickness of the soup. (Sometimes you have too much liquid and other times you may have to add a bit of water.)
- Season to taste. Reheat the quantity you need and pour into bowls.

Coffee with a friend while the babies play – what could be nicer?
It’s time to reveal another of The One-Handed Cook’s all-time favourite bits of kitchen kit. This week my hero gadget is the cafetiere.
I love coffee. I love coffee made at home in my cafetiere, and I love coffee in cafés. When my children were babies, it was such a treat to pack up their little tubs of food and bags of rice cakes and retreat to the warmth of a cosy café with another mum for a chat and a coffee THAT SOMEONE ELSE HAD MADE FOR ME. Such a joy. It almost made the lack of sleep worth it, just for that first sip of dark bitter liquid enlaced with creamy milk. Oh yes.
At home I always use a cafetiere for my coffee. It’s an absolute must-have for any tired parent in need of a coffee to keep them going at home, and has four key benefits:
- It’s cheap to buy (take note, Nespresso fans – you’ll soon get bored of forking out for those pod things).
- It makes decent coffee. Experiment with the amount of ground coffee you put in; you can make a really good cup. Trust me.
- You can make a cafetiere of coffee one-handed; simply just boil the kettle, add scoops of coffee (how many depends on what ungodly hour your little one clambered in to your bed in for a cuddling/wriggling/head-butting session), wait for a bit, and then push down the button, and pour into favourite cup.
- You can buy little cafetiere jackets to keep the coffee in your cafetiere hotter for longer – an essential purchase for all parents – you’ve made the coffee, but who knows when you are actually going to be able to drink it? When you do get to it, you want it to actually be hot! I got mine on Amazon, and it really works.

Cafetiere in its jacket with my favourite mug.
Enjoy your coffee this fine November morning. Even better, enjoy it with a friend 🙂
TOHC xx

Let’s raise a glass to having a well-stocked kitchen cupboard!
If you could choose only 10 kitchen store-cupboard must-haves,
what would they be?
Lifestyle blog Tombola Times has set out to reveal the nation’s Top 10 Must-Have Store Cupboard Items and got in touch asking if I’d share my most essential items with them. Not an easy task – there are so many ‘must-have’ things in my cupboard, that choosing just 10 was tricky!
Having the right things at hand in the kitchen makes it easier to eat well, and means you can always rustle up a delicious meal, even if you are short of time or inspiration. So I accepted the challenge, and you’ll find my Top 10 kitchen cupboard essentials for busy mums and dads below…
TT have even set up a survey asking for your ultimate kitchen cupboard items, and they’ll be collecting all the answers and publishing the nation’s favourites next month. So do take part here https://www.tombola.co.uk/times/food-lovers-ultimate-store-cupboard/ and share your store cupboard essentials. Everyone who takes part in the survey has a chance of winning the nation’s Top 10 Store Cupboard items in the form of a lovely hamper. So get over there and make your selection! I am sure you have some products you swear by that are different to mine, for instance. (Pray, do tell…)
*drumroll*
Here are my Top 10 Hero Kitchen Cupboard essentials, complete with notes on each item. NB They are in no particular order; all are essential!
1. Free-range eggs
Versatile, cheap, nutritious – if you’ve got eggs and some salt & pepper, you’ve always got a quick and easy meal. Poached, scrambled, boiled, fried or used to make a quick carbonara sauce for pasta – eggs are the ultimate convenience food.
2. Arborio rice
Keep on hand for when you have leftover roast chicken or vegetables and make a delicious creamy risotto with stock and Parmesan grated in. Kids love it.
3. Tinned chopped tomatoes
A must for every cupboard – whether you’re whipping up a Bolognese, a casserole, or a simple pasta sauce, tinned tomatoes are packed with flavour. My favourite brand is Napolina.
4. Pasta
Where would we be without it? Many’s the time I’ve thought ‘what the heck are we going to have for dinner?’, spotted the pasta, eyed up the contents of the fridge, and created supper out of practically nothing. Best brand? De Cecco, without a doubt.
5. Tinned albacore tuna
We are fans of Sainsbury’s albacore tuna, which tastes about a hundred times nicer than bog-standard tuna. A great lean protein source, it has a lovely flavour, a good firm texture and is delicious in salads, pasta dishes or with mayo in sandwiches.
6. Soy sauce
I buy Kikkoman’s soy sauce; always have, always will. It’s fantastic in stir-fries, adds bite to salad dressings and makes a great marinade for chicken, fish or steaks.
7. Olive oil
I tend to use extra-virgin olive oil in dressings and to drizzle on food, and a lighter olive oil for cooking. High in monounsaturated fat it’s a healthier choice for the family.
8. Maple syrup
The best one I’ve discovered is Waitrose’s organic maple syrup – it tastes simply divine. Drizzle maple syrup one-handed on to pancakes at the weekend, add to cakes and muffins when baking, or pour onto plain yogurt and dot with fresh berries. Yum.
9. Peanut butter
My favourite is Whole Earth’s Crunchy Peanut Butter as it contains just peanuts, oil and salt. It’s brilliant on its own on toast or rice cakes, with bananas and maple syrup on pancakes, or added to stir-fries for a satay-style kick.
10. Garlic
I don’t think I could cook without fresh garlic; along with salt, pepper, and my array of herbs and spices, it’s what gives my savoury dishes depth and flavour. Love it.
Of course, if I could pick 11, red wine would definitely be on there! 😉 What do you think of my list? Would yours be different? Take part in the survey here and share your store cupboard essentials.
Happy cooking, folks!
TOHCx
This is a commissioned post.
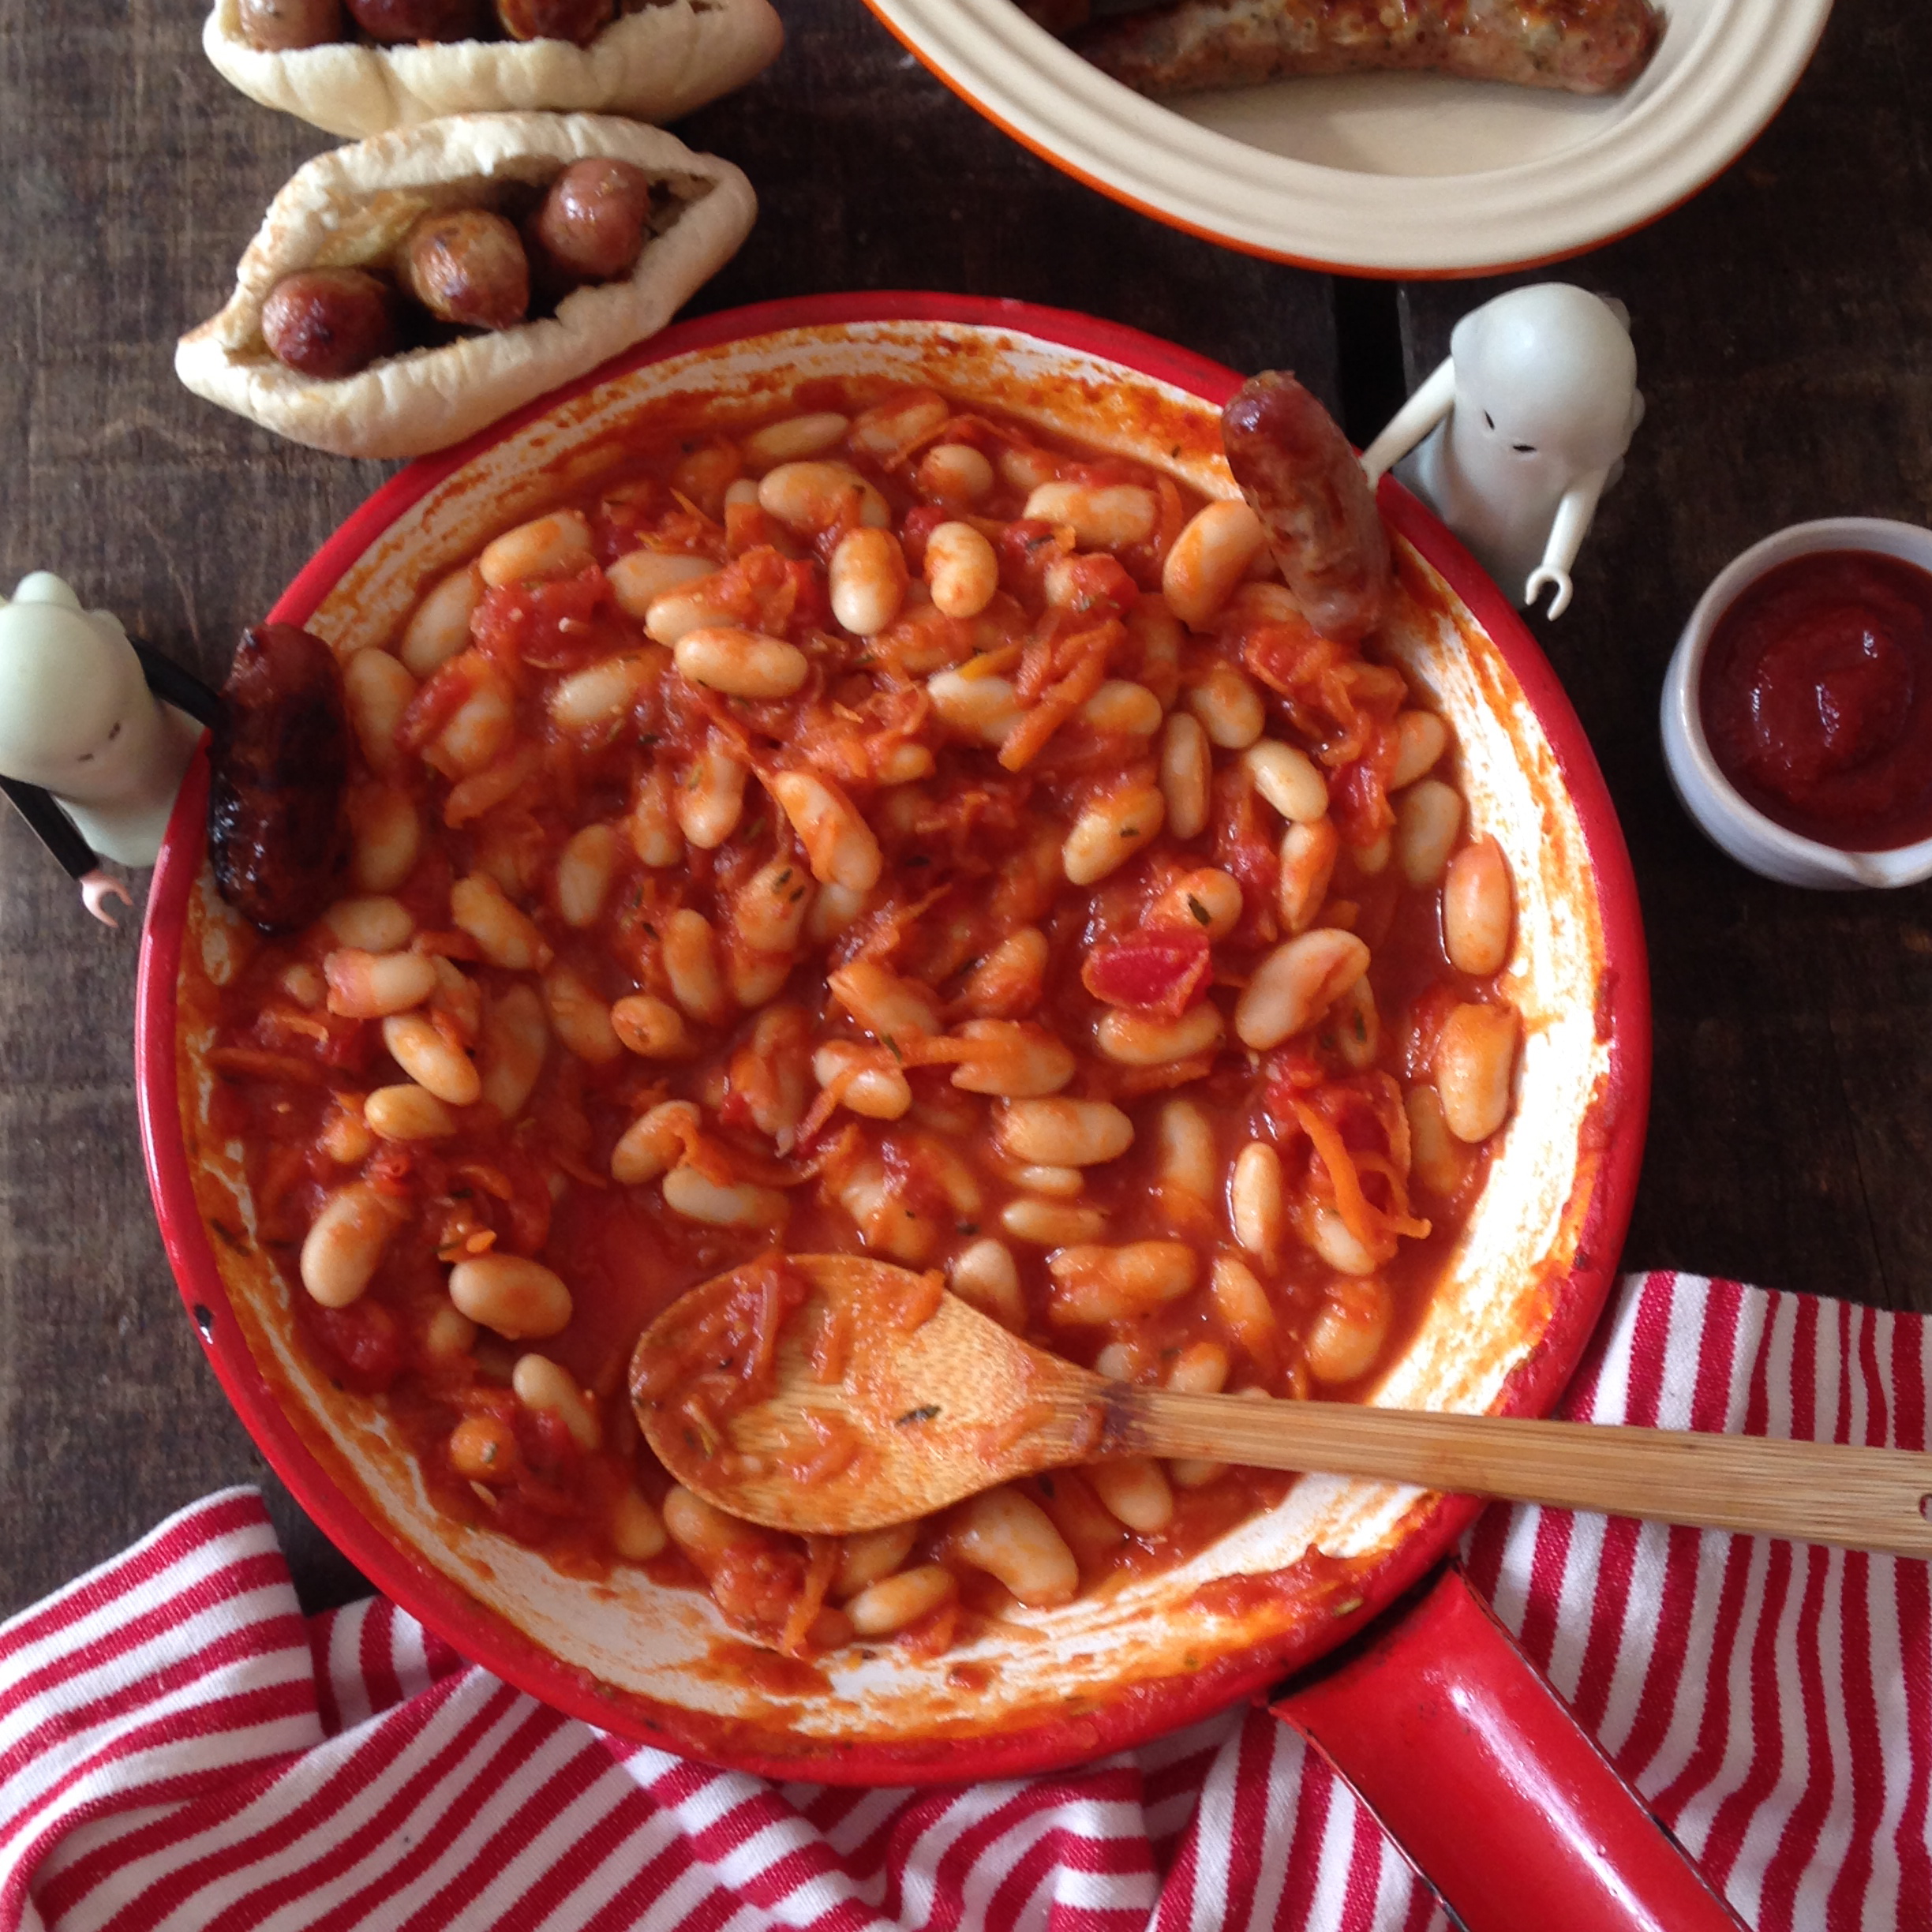
Smoky Bangers and Beans
I recently had a great session on food styling for blog photography with a food stylist. We had a great session making these Smoky Baked Beans and Bangers, and I really enjoyed using my Playmobil ghosts to make them feel a bit autumnal and spooky. This would be a nice dish for a Bonfire Night gathering.
I love the dish styled in the gorgeous red enamel saucepan. This was picked up in a charity shop! I have to confess, much as I love a browse in a secondhand store, kitchenware is not something I would have thought of looking for, so that inspired me straight away.

Smokin’!
This is an easy dish to make and perfect for autumnal evenings now the nights are drawing in. Healthy cannellini beans are full of fibre and the dish contains no added sugar, unlike tinned baked beans. Grating the onion, carrot and garlic is a ‘grate’ (sorry) quick tip and means less chopping, obvs.
Smoky Baked Beans
You will need:
1 tbsp olive oil
1 small onion, grated
1 carrot, grated
1 garlic clove, grated
1 tsp mixed herbs
Pinch smoked paprika
400g can chopped tomatoes
1 can cannellini beans, rinsed and drained
Cooked mini sausages, and mini pitta breads to serve with the beans.
What to do:
- Heat the oil in a large non-stick frying pan. Add the onion and carrot and cook for 3 minutes until starting to soften.
- Add the garlic, herbs and paprika and continue to cook for a couple of minutes.
- Add the tomatoes and beans, bring to the boil and let them bubble for 5 minutes or until thickened.
- Season with salt and pepper before serving with mini sausage pittas.
Happy Bonfire Night, and be safe.
TOHC x

Hell, it’s Halloween
I recently had the pleasure of spending a day with professional food stylist Rosie Reynolds, who gave me some expert food styling advice for food blog photos. Rosie and I met through work, and she was so enthusiastic about my blog, she came to see me at One-Handed HQ for a Halloween-themed baking, decorating and photo session.
We baked delicious chocolate cupcakes, which we decorated using jelly snakes to make Snake Cupcakes, and with chocolate icing and cola laces to make Spider Cupcakes, which we then had great fun setting up in a spooky Halloween tableau (above), complete with skeletons dangling down, all lit by candlelight. In the words of Miranda: such fun!

Sssssssnake Cupcakes

Spider Cupcakes and Snake Cupcakes: scary
Rosie has a great eye, and one of the best tips I learnt from her was to take the photo and then look at it really carefully on-screen before deciding what to add in or what to remove to get the best possible shot. Make the change, then take another photo, and compare the two. Usually the secret is taking something away to simplify things and let the food take centre stage.
Another great tip is to try to keep the food and the styling as natural as possible – if you’re serving a casserole, for instance, don’t be afraid to dig into the food and swirl it around with the serving spoon, so it looks accessible and yummy. For cakes and puddings, a few crumbs scattered around make it look even more delicious and homemade.
For best results, shoot in natural daylight (these photos were all taken on my iPhone) and think about the background you are presenting the food on – again, natural surfaces are great for such purposes. Wood, tile and slate are good; have you got an old wooden trunk, or some tiles left over from a building project? Even an old door with peeling paint can be great for overhead shots. Sometimes the most unexpected things can work really well. Take a good look through your cookbooks or BBC Good Food and take inspiration from what they use. Pinterest is useful for ideas, too.
We had a great time styling these shots (and eating jelly snakes). I picked up some really useful tips for future posts and I hope you like them, and enjoy the cakes. Of course, they’re very sweet, so a bit of a treat for little ones. I presented them whole to the children and then cut each cake in half as I thought a whole one would be too much for one child. (I was right.) They absolutely loved them – a real Halloween hit!
Happy Halloween, folks.
TOHCxx
Spooky Halloween Cupcakes
Makes 10
40g cocoa powder
3–4 tbsp boiling water
125g butter, softened
150g caster sugar
1 tsp vanilla extract
2 large eggs
4 tbsp fat free natural yogurt
125g wholemeal flour or plain flour
1 tsp baking powder
For the icing
50g butter, softened
3 tbsp cocoa powder
3–4tbsp fat free natural yogurt
250g icing sugar, sifted
Splash of hot water if needed to make a nice smooth icing
For decorating
Cola flavour laces
75g packet jelly worms
To make the cupcakes:
1. Preheat oven to 180C/160C Fan/Gas 4. Line a muffin tray with 10 paper cases, set aside.
2. Sift the cocoa into a bowl. Stir in the water to make a smooth paste. Tip in the rest of the ingredients and beat with a wooden spoon until smooth.
3. Use two dessert spoons to evenly fill your cake cases – be careful not to overfill.
4. Bake for 18-20 minutes, or until your cakes are risen and a skewer inserted into the middle of a cake comes out clean. Remove from the oven and allow to cool completely on a wire rack.
To make the icing:
Cream the butter, cocoa and yogurt together until smooth. Gradually add the sifted icing sugar, beat after each addition until smooth. It might be a bit dry, but if you let the mix relax then keep beating it should come together, if not, add a splash of hot water to create a smooth icing.
Divide the icing between your cakes, spread over the surface with the back of a spoon.
Decorate yourself, or get bigger kids to do their own – depending on how good you are at coping with MESS!
Snake Cupcakes: We decided not to ice these, but of course you can if you want to. Simply cut your jelly snake in half, and make a little hole in the side of your cake, using your fingers. Make another little hole on the opposite side of the cupcake to enable your snake to ‘slither’ through the cake – stick the head in one hole and the tail in the other. It’s that easy.
Spider Cupcakes: Spread the top of the cake with icing and use a cocktail stick to prick the icing and make little bumps. Use little sugar balls for the eyes and cut-up bits of jelly snake for eyebrows. To make the dangly legs, cut cola laces in half and tie a little knot at the end for a foot. Use the cocktail stick to make a little hole for each leg.


